Why Auto-Tracing Logos Produces Poor Vector Results
Auto-trace is the button in Illustrator, Inkscape and dozens of free online converters that promises to turn a JPEG or PNG logo into a vector in one click. It is fast and it is cheap, and for some jobs it is good enough. For a logo that has to print cleanly on a sign, a shirt or a vehicle, it usually is not. This article explains what auto-trace actually does, the problems it creates, how to spot an auto-traced file, and when it is worth paying for a logo to be redrawn by hand.
What auto-tracing really does
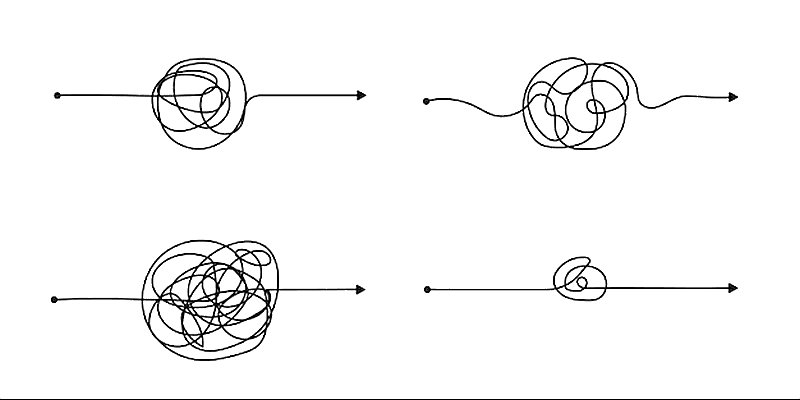
An auto-trace tool looks at the pixels in your image and tries to guess where the edges of each shape are, based on changes in colour and contrast. It then draws paths along those guessed edges. It has no idea what it is looking at. It does not know that a letter “O” should be a smooth, even ring, that two lines are meant to be parallel, or that a corner should be sharp rather than rounded.
The quality of the result depends almost entirely on the quality of the original. A large, crisp image with flat colours can trace reasonably well. A small, blurry, compressed JPEG pulled from a website or a Facebook profile, which is what most people actually have, gives the software very little to work with. It traces the blur, the JPEG artefacts and the jagged pixel edges as if they were part of the design. If you want to know more about why small images cause trouble, see Enhancing Low-Resolution Images: From Pixelated to Perfect.
Common problems caused by auto-tracing
Auto-traced vectors often look acceptable on screen at a small size. The problems show up when the logo is enlarged, cut, stitched or printed. The most common ones are:
- Wobbly or lumpy curves. Circles and arcs come out slightly flattened or dented, because the software followed the stepped pixel edge rather than the intended curve.
- Hundreds or thousands of anchor points. A clean letter might need 8 to 15 points. An auto-traced one can have 80. Files become heavy, slow to edit and difficult for cutters and engravers to process.
- Distorted letterforms. Thin strokes thicken, serifs melt into blobs, and the gaps inside letters such as “e”, “a” and “8” fill in or change shape.
- Rounded corners that should be sharp. Square corners on letters, boxes and icons get softened, which makes the whole logo look slightly out of focus.
- Uneven line thickness. Outlines that should be a consistent weight vary along their length.
- Stray specks and fragments. Tiny shapes created from noise or compression artefacts, often invisible until a vinyl cutter tries to cut them.
- Too many colours. A two-colour logo can come back as a dozen near-identical shades, which causes problems for screen printing and spot-colour work.
Where these problems show up in real jobs
Here are some typical situations where an auto-traced logo causes trouble once it reaches production:
- Signage and vehicle graphics. A logo enlarged to 2 metres wide on a shopfront or ute shows every wobble in the curves. What looked fine on a business card now looks homemade.
- Vinyl cutting. Plotters follow every anchor point. Excess points and stray specks lead to jagged cuts, tiny pieces that are impossible to weed, and wasted material.
- Embroidery. Digitisers need clean, simple shapes to create good stitch paths. Lumpy outlines and filled-in counters produce messy stitching, especially on small left-chest logos and caps. Read more in Vector Files for Embroidery, Screen Printing and Laser Cutting.
- Screen printing. Each colour needs its own screen. A traced file with ten slightly different shades of blue has to be cleaned up before films can be made.
- Laser cutting and engraving. Overlapping paths and open shapes can cause double burns or parts that do not cut free.
In each case the printer or maker either sends the file back, charges an artwork fee to fix it, or produces a result that does not look as good as it should. See What Printers Actually Need: Vector File Requirements Explained for the full list of what most print shops expect.
How to tell if your logo has been auto-traced
If you already have a vector file and are not sure how it was made, open it in Illustrator, Inkscape or Affinity Designer and try the following:
- Switch to outline view (Ctrl/Cmd + Y in Illustrator). Auto-traced shapes often show wobbly edges and lots of small segments.
- Select a letter with the Direct Selection tool. If it is covered in anchor points, it was almost certainly traced.
- Zoom in to 800% or more on curves and corners. Look for bumps, flat spots and corners that are rounded when they should be sharp.
- Check the colours. Open the swatches or use Select > Same > Fill Colour to see whether a “one colour” area is really several colours.
- Look for live text or fonts. A traced logo will never contain real type. A hand-built one may include the original font name, which is useful if you ever need matching text.
Our guide How to Check If Your Logo Is Truly a Vector File goes through this step by step.
Why AI and auto-trace are not the same as professional vector work
Newer AI-based converters are better than the old trace tools, but they work on the same principle: guessing shapes from pixels. They are built for speed and they do not understand brand proportions, font integrity or the limits of a particular production method.
A professional vector artist redraws the logo by hand. That means:
- Using the minimum number of anchor points so curves are smooth and even.
- Rebuilding straight lines, right angles and circles with geometric accuracy.
- Identifying the original fonts where possible, or redrawing the lettering faithfully when the font is custom or unknown.
- Setting exact colours, with CMYK and Pantone (spot) values where needed.
- Organising the file into tidy, closed, non-overlapping shapes that work for print, cutting and stitching.
The result looks the same as your logo at any size, from a 20 mm embroidered badge to a building sign, and it can be edited easily later.
When is auto-trace good enough?
To be fair to the tools, there are times when a quick trace is fine:
- A one-off, small-sized internal use where nobody will look closely.
- Simple, bold shapes traced from a large, high-quality source image.
- Rough artwork for a mock-up or concept that will be redrawn later.
For anything that represents your business in public, or anything going to a sign writer, embroiderer, screen printer or laser cutter, hand redrawing is the safer choice.
When manual vector conversion is essential
Manual conversion is the right choice for:
- Business logos and brand marks
- Artwork for signage, vehicle wraps and large-format print
- Files for embroidery, vinyl cutting, screen printing and laser engraving
- Old, scanned or low-resolution logos that need to last for years
- Any file you will hand to multiple suppliers over time
If you only have a small JPEG or PNG, or a vector file that you suspect was auto-traced, send it through and we will tell you what can be done. Get a quote – it is free, and most jobs are back within 24 hours. You can also see examples and prices on our image to vector conversion page.
Need your logo or image as a true vector?
Send it to VectorMan and we’ll redraw it by hand in Illustrator as a clean, editable vector (EPS, AI, SVG). From $55 · Free quote · Most jobs back within 24 hours.